A slow WordPress site costs rankings, conversions, and visitor patience. Studies consistently show that a one-second delay in page load time reduces conversions by 7% and page views by 11%. Caching is the single highest-impact performance optimisation available to WordPress sites — it serves pre-built versions of pages rather than regenerating them from the database on every request, turning a 3-second uncached load into a 300-millisecond cached one. This WordPress caching guide covers every caching layer from browser to server, so you can implement the right combination for your specific hosting environment. For a broader walkthrough, our Complete Guide to WordPress How is a good next read.
WordPress Caching Guide — The Four Layers You Need to Know
This WordPress caching guide starts with understanding that effective WordPress caching involves four distinct layers, each targeting a different bottleneck in the request-response chain. Understanding all four layers in this WordPress caching guide prevents the common mistake of installing one plugin and wondering why the site is still slow — because one plugin rarely covers all four layers simultaneously.
Page caching stores the complete HTML output of a page as a static file. When a visitor requests the page, the server serves the cached HTML directly without executing any PHP or querying the database. This is the most impactful cache layer — reducing TTFB (Time to First Byte) from hundreds of milliseconds to under 50ms on a good server. Browser caching instructs the visitor’s browser to store static assets (CSS, JavaScript, images, fonts) locally so they are not re-downloaded on subsequent page loads. Object caching stores the results of database queries and PHP computations in memory (via Redis or Memcached) so WordPress can reuse them across requests without re-running the query. CDN caching stores static assets and sometimes full page HTML at geographically distributed servers, serving content from a location physically closer to the visitor. A thorough WordPress caching guide addresses all four layers — implementing only one while ignoring the others leaves significant performance on the table.
Every WordPress caching guide needs to match the hosting environment — the right combination differs significantly. Shared hosting with cPanel: use WP Rocket or W3 Total Cache for page caching, and configure browser caching via .htaccess. LiteSpeed-powered hosting (common with SiteGround, A2 Hosting, Hostinger): use LiteSpeed Cache, which integrates directly with the LiteSpeed web server for server-side caching unavailable to other plugins. Managed WordPress hosting (Kinsta, WP Engine, Cloudways): the host provides server-level page caching — do not install a page caching plugin on top of it as this causes conflicts. Use only the host’s cache-purging integration and focus on browser caching and CDN configuration. VPS or dedicated server with Nginx: configure FastCGI caching at the Nginx level for maximum performance, then use a lightweight plugin for browser cache headers and CDN integration.
Setting Up Page Caching With WP Rocket
WP Rocket is the most beginner-friendly plugin and the one most consistently recommended in this WordPress caching guide for sites without server-level caching. It configures all essential caching and performance settings through a clean admin interface, with sensible defaults that produce significant improvements without requiring server access or technical knowledge.
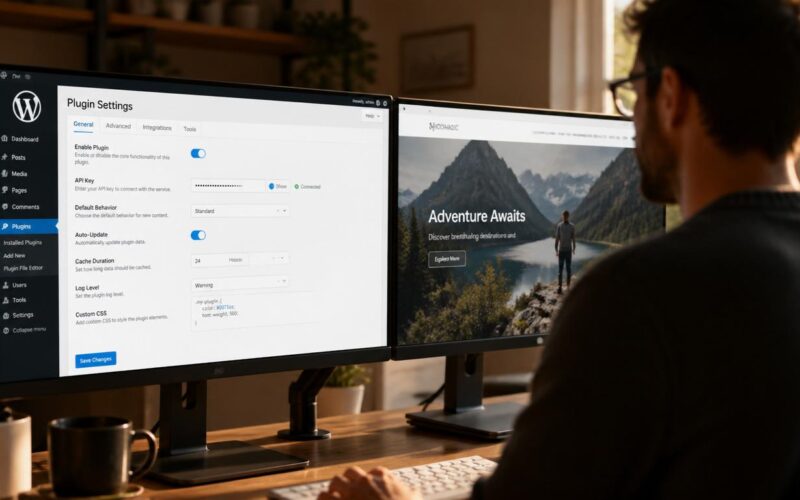
Purchase and install WP Rocket — the WordPress caching guide starting point for non-technical sites → the plugin immediately enables page caching with its defaults. Navigate to Settings → WP Rocket to review the configuration. The most impactful settings beyond the default page cache: enable Minify CSS and JavaScript (reduces file sizes), enable File Concatenation (reduces HTTP requests by combining files), enable LazyLoad for images and iframes (defers offscreen image loading until needed), and enable Preload (crawls the site after cache clears to rebuild page cache proactively). Under the Advanced Rules tab, add any URLs that should not be cached — checkout pages, account pages, and any dynamic content that must be generated fresh per user.
This WordPress caching guide step — CDN integration — is handled automatically by WP Rocket (Cloudflare, StackPath, RocketCDN) through its CDN tab — enter the CDN URL and WP Rocket rewrites asset URLs to point to the CDN, ensuring browsers load CSS, JavaScript, and images from the geographically closest CDN edge node. The plugin also handles cache invalidation correctly: when a post is updated or published, WP Rocket automatically clears the cache for that post and any related archive pages, ensuring visitors always see current content without manual cache-clearing. This automatic invalidation is the primary advantage of a dedicated WordPress caching guide-recommended plugin over manually configured server caching — intelligent invalidation prevents stale content without requiring manual intervention after every update. According to Google’s web performance documentation, page caching combined with CDN delivery is the most effective performance intervention for database-driven sites, consistently reducing TTFB by 80–95% compared to uncached WordPress.
LiteSpeed Cache — The Best Free Option for LiteSpeed Servers
LiteSpeed Cache is the best-performing free option in this WordPress caching guide for LiteSpeed-powered servers. Unlike other caching plugins that write static HTML files to disk, LiteSpeed Cache stores cached pages in server memory using the LiteSpeed Enterprise or OpenLiteSpeed cache engine, producing faster TTFB than disk-based caches.
The WordPress caching guide step for LiteSpeed servers: install LiteSpeed Cache → activate → the plugin automatically detects whether the server runs LiteSpeed and enables server-level caching. Navigate to LiteSpeed Cache → Cache → enable Cache and Cache Logged-in Users (if you have a membership site). Under Optimise, enable CSS/JS minification, combination, and lazy load. Under CDN, configure Cloudflare or any QUIC.cloud CDN integration. QUIC.cloud is LiteSpeed’s own CDN service with a free tier that integrates seamlessly with the plugin, providing both CDN edge caching and image optimisation. The free QUIC.cloud tier covers most small to medium sites and is the fastest path to CDN-enhanced performance for LiteSpeed-hosted sites.
LiteSpeed Cache’s ESI feature handles the hardest scenario in any WordPress caching guide: dynamic content within otherwise cacheable pages. Cart totals in WooCommerce headers, login/logout buttons, and personalised greeting messages all vary per user — without ESI, the entire page must be served uncached to any logged-in user. With ESI, LiteSpeed Cache serves the static page from cache and replaces ESI-marked sections (the cart total, the login button) with dynamically generated fragments, combining the performance of full-page caching with the correctness of dynamic content. This makes LiteSpeed Cache the most powerful free option for WooCommerce sites where caching logged-in user pages is otherwise impractical. Our guide on optimising WordPress performance covers the full performance stack that complements caching, including image optimisation and database query reduction that makes the most of the speed gains caching provides.
Object Caching With Redis and Memcached
Page caching is essential, but a complete WordPress caching guide must cover object caching too — caching the results of database queries and expensive PHP computations in server memory so they can be reused across requests within the same page and across different page loads.
WordPress includes a built-in object cache, but by default it only persists for the duration of a single page request (non-persistent cache). Each new request starts with an empty cache and must re-run every database query. Persistent object caching with Redis or Memcached stores query results between requests — a query that fetches navigation menus, widget data, or site options runs once and serves subsequent requests from memory instead of the database. On sites with complex queries, many active plugins, and high traffic, persistent object caching reduces database load by 50–80% and cuts PHP execution time significantly.
Enable Redis — the WordPress caching guide step that reduces database load by 50–80%: most managed WordPress hosts (Kinsta, WP Engine, Cloudways) provide Redis as a one-click add-on in their hosting dashboard. On VPS environments, install Redis server → install the Redis Object Cache plugin (free from WordPress plugin directory) → navigate to Settings → Redis → Enable Object Cache. The plugin writes a wp-content/object-cache.php drop-in file that WordPress uses automatically to redirect all object cache operations to Redis. After enabling, WordPress admin → Tools → Site Health confirms Redis is active and shows cache hit/miss statistics. A healthy Redis cache shows a hit rate above 90% after the first few minutes of warm-up traffic, confirming that the majority of database queries are being served from memory rather than from MySQL. Redis pairs particularly well with page caching in a complete WordPress caching guide implementation — page caching handles full-page requests, while Redis handles within-page database calls, CDN handles static assets, and browser caching handles repeat visitors.
Browser Caching and CDN Integration
The final layer of this WordPress caching guide is browser caching — instructing visitors’ browsers to store static files locally so repeat visits and navigation between pages do not require re-downloading unchanged assets. Well-configured browser caching reduces page weight for returning visitors by 60–90%, since CSS, JavaScript, and images are already in the local cache.
Configure this final WordPress caching guide layer via .htaccess on Apache servers — add Expires headers for each asset type:
<IfModule mod_expires.c>
  ExpiresActive On
  ExpiresByType image/jpeg "access plus 1 year"
  ExpiresByType image/png "access plus 1 year"
  ExpiresByType image/webp "access plus 1 year"
  ExpiresByType text/css "access plus 1 month"
  ExpiresByType application/javascript "access plus 1 month"
  ExpiresByType application/x-font-woff2 "access plus 1 year"
</IfModule>
All major caching plugins covered in this WordPress caching guide configure these headers automatically through their settings — enabling “Browser Caching” in the plugin settings writes the correct .htaccess rules without manual editing. For Nginx servers, equivalent directives go in the server block configuration rather than .htaccess. CDN integration extends this further: Cloudflare, BunnyCDN, and KeyCDN all provide their own cache-control headers and edge caching that keep assets at server locations close to visitors globally. Free Cloudflare CDN with WordPress: install the official Cloudflare plugin → connect with an API token → enable “Automatic Platform Optimisation” if on the Pro plan, or simply proxy DNS through Cloudflare for free CDN with basic caching. The combination of all four layers represents the complete WordPress caching guide implementation that high-traffic WordPress sites use to serve millions of requests efficiently. Reviews from independent web performance publications consistently confirm that correctly configured layered caching reduces WordPress server load by 70–90% compared to uncached sites running identical hardware.
Cache warming — proactively building the page cache after it is cleared — is an important but often overlooked part of this WordPress caching guide. When a cache is cleared (after a WordPress update, a plugin change, or a scheduled purge), every page must be regenerated from scratch on the next request. During this warm-up period, TTFB spikes back to uncached speeds and server load increases significantly. WP Rocket’s preload feature visits every page on the sitemap after a cache clear, building the cache proactively so it is warm before real visitors arrive. LiteSpeed Cache has a crawler with similar functionality. Enabling cache preloading in whichever plugin you use prevents the post-clear performance dip that makes scheduled cache purges feel counterproductive on high-traffic sites.
WooCommerce-specific caching requires special handling that not every WordPress caching guide covers adequately. WooCommerce cart, checkout, and account pages must never be cached because they contain user-specific data — cached cart totals could show one customer another customer’s cart. All major caching plugins handle this automatically: WP Rocket excludes WooCommerce’s dynamic pages from the page cache by default, and LiteSpeed Cache uses ESI to cache the page frame while keeping cart fragments dynamic. However, verify this exclusion is active on your site: view the source of the checkout page while logged in → if you see a “WP Rocket cache” comment or a LiteSpeed cache header in the browser Network tab for the checkout page, the dynamic page exclusion has not been applied correctly. Add the checkout, cart, and My Account page URLs to the plugin’s “never cache these URLs” list manually to guarantee user-specific pages are always served fresh.
Measuring the impact of this WordPress caching guide implementation confirms whether each caching layer is functioning correctly. Use Google PageSpeed Insights (free, at pagespeed.web.dev) to test the site before and after implementing each caching layer. A properly cached WordPress site running on a decent server should score above 90 on mobile for Performance in PageSpeed Insights. TTFB (Time to First Byte) should be below 200ms for cached pages. The “Serve static assets with an efficient cache policy” PageSpeed recommendation disappearing after browser caching is configured confirms the Expires headers are correctly set. The “Reduce server response times” recommendation improving after Redis object caching confirms the object cache is reducing database processing time. Documenting the before-and-after scores at each stage of this WordPress caching guide implementation creates a performance baseline that guides future optimisation decisions. Our guide on clearing WordPress cache safely covers the correct purge procedures for each caching layer to use when cache entries need to be invalidated without disrupting the full caching stack built in this guide. See also WordPress Category Page 404 for a related case.