The phrase “have you tried clearing your cache?” is so overused as a generic tech support deflection that many WordPress users tune it out — but it is worth paying attention to when the problem is actually cache-related, because failing to clear WordPress cache correctly is one of the most common reasons that content updates, design changes, and bug fixes do not appear as expected. The challenge is that “WordPress cache” is not a single thing — it is several distinct caching layers that operate at different points in the request-response cycle, and knowing which cache layer is serving stale content determines which specific cache needs to be cleared. Blindly pressing “Purge All” in a caching plugin when a CDN is serving old content from its edge nodes, or clearing the CDN when the problem is a stale browser cache, wastes time without resolving the issue. This guide covers every cache layer that affects WordPress content delivery, how to identify which one is causing the stale content problem, and the exact steps to clear WordPress cache at each layer safely. For a broader walkthrough, our Complete Guide to WordPress How is a good next read.
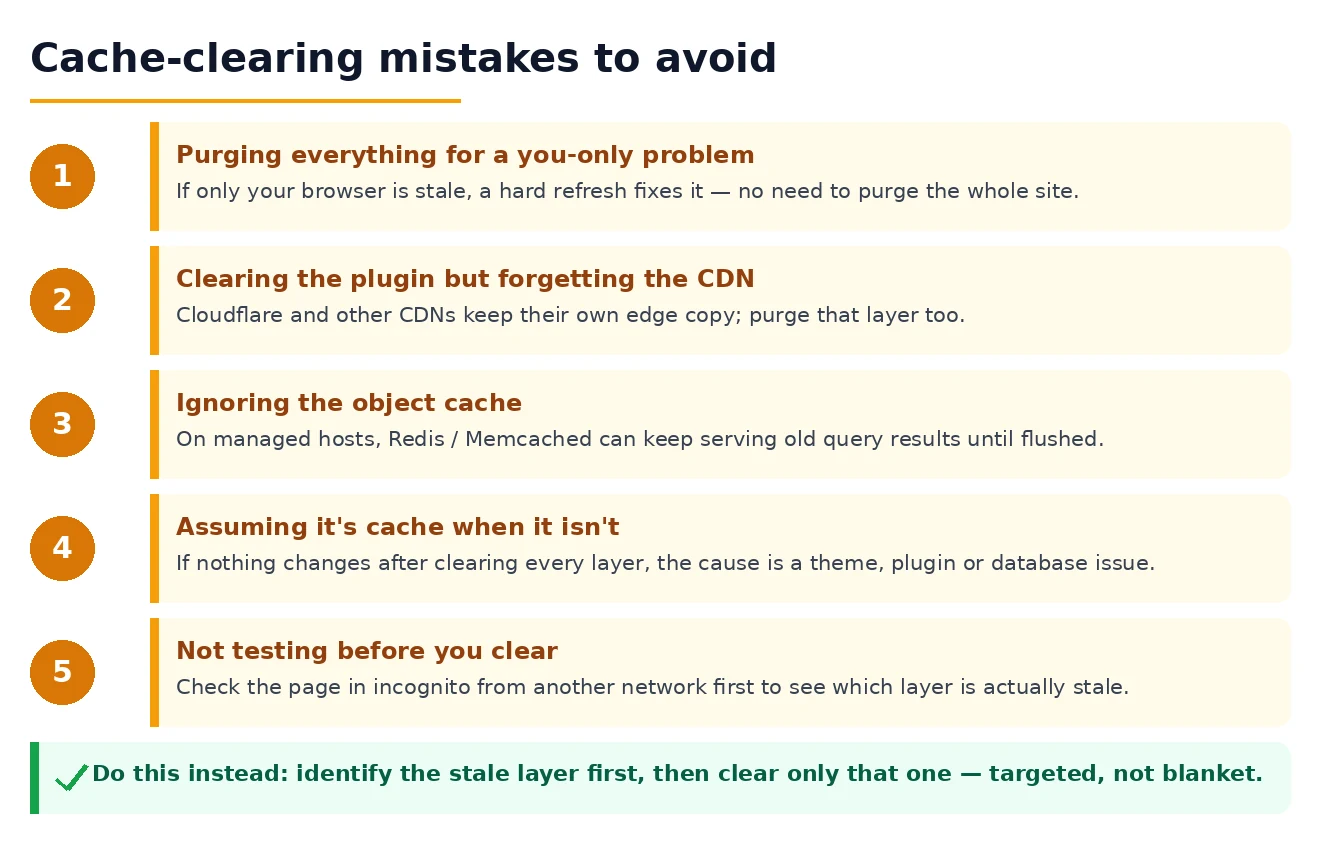
The cache identification shortcut: Before clearing anything, test the page in question in multiple browser incognito windows from different networks (your home broadband, your mobile network). If all show the same stale content, the problem is server-side cache (plugin cache or CDN). If only your regular browser shows stale content and incognito shows updated content, the problem is browser cache only — and the fix is a single browser cache clear.
The Different WordPress Cache Layers and What Each Holds
WordPress content delivery involves up to five distinct caching layers between the server and the visitor’s browser. To clear WordPress cache effectively, understanding what each layer holds and when it causes stale content issues is the starting point for targeted rather than blanket cache clearing.
The WordPress page cache (managed by plugins like WP Super Cache, W3 Total Cache, WP Rocket, or LiteSpeed Cache) stores static HTML snapshots of pages. When a visitor requests a page, the caching plugin serves the stored snapshot instead of executing PHP and querying the database. Page cache becomes stale when content is updated, plugins are changed, or theme modifications are made. This is the cache that most people are referring to when they say “clear the WordPress cache” — and it is the most common source of stale content after content updates.
The WordPress object cache stores the results of database queries and computed values in memory (or in Redis/Memcached if configured). Unlike the page cache, the object cache is per-request and typically refreshes automatically on each new request cycle — it rarely needs manual clearing except after specific database changes that bypass the object cache’s invalidation logic. The browser cache is entirely on the visitor’s side — the browser stores CSS, JavaScript, images, and sometimes HTML locally to avoid re-downloading them on every visit. This is the cache that produces “I can see the change but my client can’t” scenarios — they are seeing a cached version while you see the updated version from a fresh session. The CDN cache sits at the network edge between the server and visitors, serving cached copies of pages and assets from nodes geographically close to each visitor. CDN cache mismatches are common after content updates when the CDN has not yet received an invalidation signal. The DNS cache caches domain-to-IP mappings and is relevant after domain or server changes rather than content updates — it is rarely the source of stale content on an established site.
Clear WordPress Cache Through Your Caching Plugin

Clearing the WordPress page cache through the active caching plugin is the most direct and most commonly needed cache-clearing operation. The exact steps depend on which caching plugin is installed, but the principle is identical across all of them: tell the plugin to discard all stored page snapshots so the next request for each page triggers a fresh PHP execution and database query to generate updated content.
- WP Super Cache: Settings → WP Super Cache → Delete Cache button. For selective clearing, use the Delete Cache By URL option to clear specific pages without discarding the entire cache
- W3 Total Cache: Performance → Dashboard → Empty All Caches button, or from the admin bar W3TC menu → Purge All Caches
- WP Rocket: Admin bar → WP Rocket → Clear Cache. WP Rocket also automatically clears the cache for a post when it is published or updated — so manual clearing is only needed for theme or plugin changes that affect multiple pages simultaneously
- LiteSpeed Cache: Admin bar → LiteSpeed Cache → Purge All. LiteSpeed Cache on LiteSpeed/OpenLiteSpeed servers operates at the server level, making its purge more comprehensive than plugin-level caching
- Kinsta, WP Engine, or other managed host caching: These hosts implement server-level full-page caching independently of any WordPress caching plugin. Clear via the hosting dashboard (Kinsta → MyKinsta → Tools → Clear Cache; WP Engine → Utilities → Cache → Purge All)
After clearing the WordPress page cache, load the page that was showing stale content in a new incognito browser tab to bypass any browser-side cache and confirm the updated content appears. If the update still does not appear in incognito after clearing the page cache, either the CDN is serving old content (next section) or the update itself was not saved correctly — verify in the WordPress editor that the published version of the content reflects the intended changes before investigating further cache layers.
Clear the Browser Cache When Stale Content Affects Only Your Browser
Browser cache is the most localised of all cache layers — it affects only the specific browser on the specific device that has cached the old content. If the page shows updated content in incognito or on another device but shows stale content in your regular browser, clearing the browser cache resolves it without touching any server-side configuration. This is also the scenario for clients who report seeing old content when the site has clearly been updated.
To clear WordPress cache in the browser on Chrome: press Ctrl+Shift+Delete (Windows) or Cmd+Shift+Delete (Mac) → set time range to “Last 24 hours” minimum → check “Cached images and files” and “Cookies and other site data” → click “Delete data.” Hard refresh (Ctrl+Shift+R on Windows, Cmd+Shift+R on Mac) forces a fresh request ignoring cached resources without clearing the full cache — useful for testing whether browser cache is the issue before committing to a full clear. On Firefox, the same shortcut opens the equivalent clearing dialog. On mobile browsers, cache clearing is in the browser settings (Chrome → Settings → Privacy and Security → Clear Browsing Data).
For clients reporting stale content after you have confirmed the server is serving updated content: the simplest instruction is to open the affected page in a new incognito/private window. If they see the correct content in incognito, their browser cache is the issue and clearing it resolves it. A more permanent client-facing fix is to implement cache-busting headers for static assets — configuring the server to add version parameters to CSS and JS file URLs so the browser recognises them as new files requiring a fresh download rather than serving the cached version. Most caching plugins handle this automatically by appending version strings to asset URLs when those assets change.
Clear WordPress Cache at the CDN Level — Cloudflare and Others
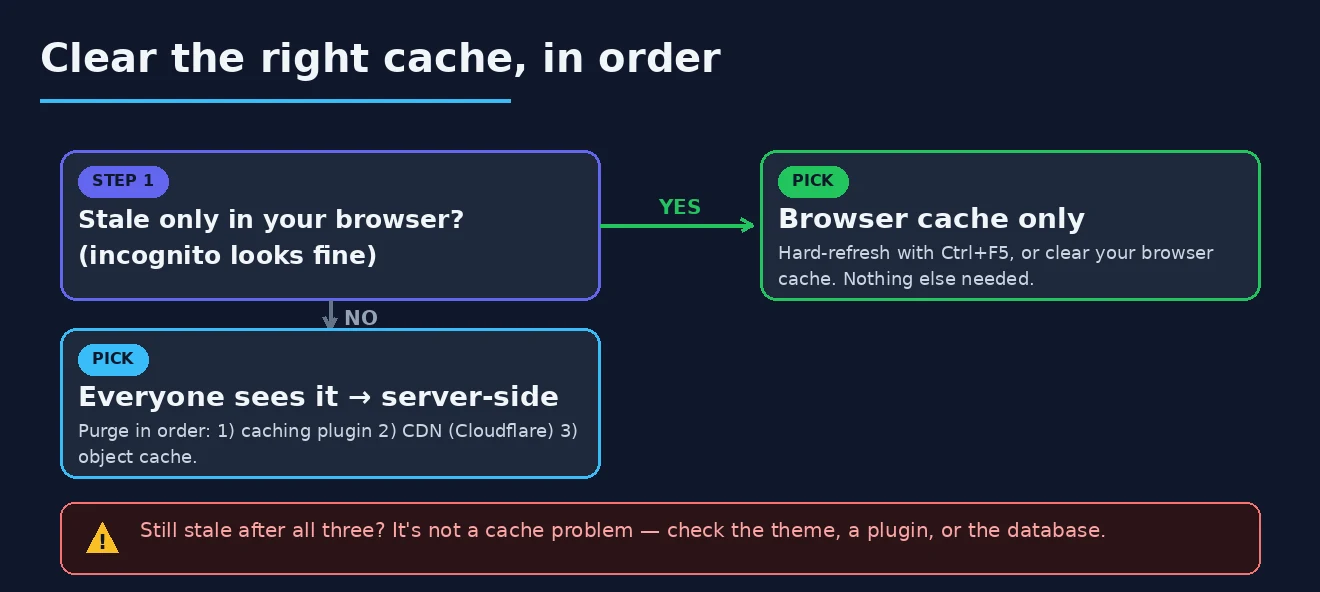
CDN cache is the layer most commonly overlooked when troubleshooting stale content after an update. The CDN stores copies of pages and assets at edge nodes geographically distributed around the world. When you update content on the origin server and clear the WordPress page cache, the CDN edge nodes may still be serving their cached copies to visitors until those copies expire or are explicitly purged. The result is that visitors in some geographic locations see updated content (those hitting edge nodes whose cached version happened to expire) while visitors in other locations see stale content (those hitting edge nodes still serving the old cached version).
- Cloudflare: Log in to the Cloudflare dashboard → select your site → Caching → Cache Purge → Purge Everything. For selective purging, Custom Purges allows entering specific URLs to clear without discarding the entire CDN cache. Cloudflare also provides a WordPress plugin (Cloudflare plugin or the Super Page Cache for Cloudflare plugin) that automatically purges the CDN cache when WordPress content is updated, reducing the need for manual CDN cache clearing to a one-time setup task
- BunnyCDN: Dashboard → Storage Zones or Pull Zones → select the zone → Purge Cache
- Sucuri CDN: Sucuri dashboard → Performance → Clear Cache
- Managed host CDN (Kinsta, WP Engine): The same dashboard cache clear that purges the page cache also clears the CDN cache on most managed hosts — they are integrated rather than separate operations
The WP Rocket plugin includes Cloudflare CDN integration that purges the Cloudflare cache automatically when WordPress content is updated, published, or when the WordPress cache is manually cleared. Configuring this integration (WP Rocket → Settings → CDN → Cloudflare) eliminates the need to separately clear WordPress cache at the Cloudflare level for the majority of content updates — the cache clearing cascades automatically from the WordPress admin action.
Clear the WordPress Object Cache and Database Cache
The WordPress object cache is typically the least problematic cache layer to manage — it is designed to be per-request and self-refreshing, so stale object cache data is not a common cause of visible content problems. However, in specific scenarios — after a direct database modification via phpMyAdmin that bypasses WordPress, after a search-and-replace operation, or when a persistent object cache (Redis or Memcached) is configured — manually clearing the object cache ensures WordPress reads fresh data rather than cached database query results from before the change.
For plugin-based object caching: most caching plugins include an “Object Cache” section in their settings or their admin bar menu. WP Rocket → WP Rocket admin bar → Purge OPcache (for the opcode cache) and Clear → Object Cache. W3 Total Cache → Performance → Object Cache → Flush Object Cache. LiteSpeed Cache → Admin bar → Purge → Purge Object Cache. For Redis-based object caching via the Redis Object Cache plugin: navigate to Settings → Redis → Flush Cache button.
WP-CLI provides the most reliable method to clear WordPress cache at all levels from the command line: wp cache flush clears the WordPress object cache; wp litespeed-purge all or wp super-cache flush (using the respective plugin’s WP-CLI commands) clear the page cache. Running these commands after any significant database change or deployment gives a clean cache state across all WordPress caching layers without needing to navigate multiple admin interfaces. On managed hosting plans that provide SSH and WP-CLI access, this is the fastest and most complete way to clear WordPress cache as part of a deployment or update workflow.
When Clearing the WordPress Cache Does Not Fix the Problem
After clearing every cache layer — plugin page cache, CDN, browser, object cache — if the stale or incorrect content still appears, the problem is not a cache issue at all. This situation is more common than it sounds: cache clearing has become a reflexive first step that sometimes obscures the actual problem when it does not resolve things.
Common non-cache causes of apparent stale content after you have confirmed all caches are clear:
- The update was not actually saved: WordPress’s autosave system sometimes creates the impression of a saved post when the actual save did not complete. Check the post’s revision history — if the intended version is not in revisions, the save failed and the update needs to be re-entered
- The page is a static HTML file: On servers with aggressive caching configurations, a page may have been written as a static file that is served by the web server directly, bypassing WordPress entirely. Clearing the WordPress plugin cache does not clear this server-level static file — it requires deletion of the static file directly via FTP or the hosting file manager
- A theme template is overriding the content: Some themes hard-code content in template files rather than pulling from the WordPress database — changes in the WordPress editor do not appear because the template serves static HTML regardless of database content
- The correct URL is not being tested: www and non-www, http and https, and trailing slash vs no trailing slash can all point to different cached versions or different pages. Confirm you are testing the exact canonical URL that the change was applied to
- A redirect is serving an old cached redirect destination: If the page URL has changed and a redirect is involved, the redirect itself may be cached at the browser or CDN level, pointing to a destination that no longer exists
Our guide on fixing the WordPress REST API error covers the scenario where caching of REST API responses causes problems in the block editor — a specific cache-related issue that appears as editor failures rather than visible stale content. Our guide on how to speed up WordPress website fast covers caching configuration as a performance tool — the same caching systems that create stale content issues when misconfigured provide significant speed benefits when properly managed. The WP Super Cache documentation and the WP Rocket documentation cover the full cache management options for the two most widely used WordPress caching plugins. See also How to Fix WordPress 403 Forbidden Error Safely With Effective Steps for a related case.