There are countless reasons to capture what is happening on your monitor: making a tutorial, saving a video call, recording gameplay, showing a colleague a bug, or keeping a demo for later. Whatever the reason, the good news is that you do not need to buy or install anything to get started, because Windows 11 can already do it. Learning to record your screen on Windows is quicker and simpler than most people expect.
Windows 11 quietly includes two separate built-in tools for the job, each suited to slightly different situations, and between them they cover the vast majority of everyday needs at no cost. For more demanding projects there is also a thriving world of dedicated software, but most people never need to go that far.
This guide walks through both built-in methods step by step, explains how to capture audio along with the video, shows you when it is worth reaching for dedicated software instead, and covers editing, sharing, and a few tips for a polished result. By the end you will be recording your screen on Windows confidently, whichever approach suits the task.
The Built-In Ways to Record Your Screen on Windows
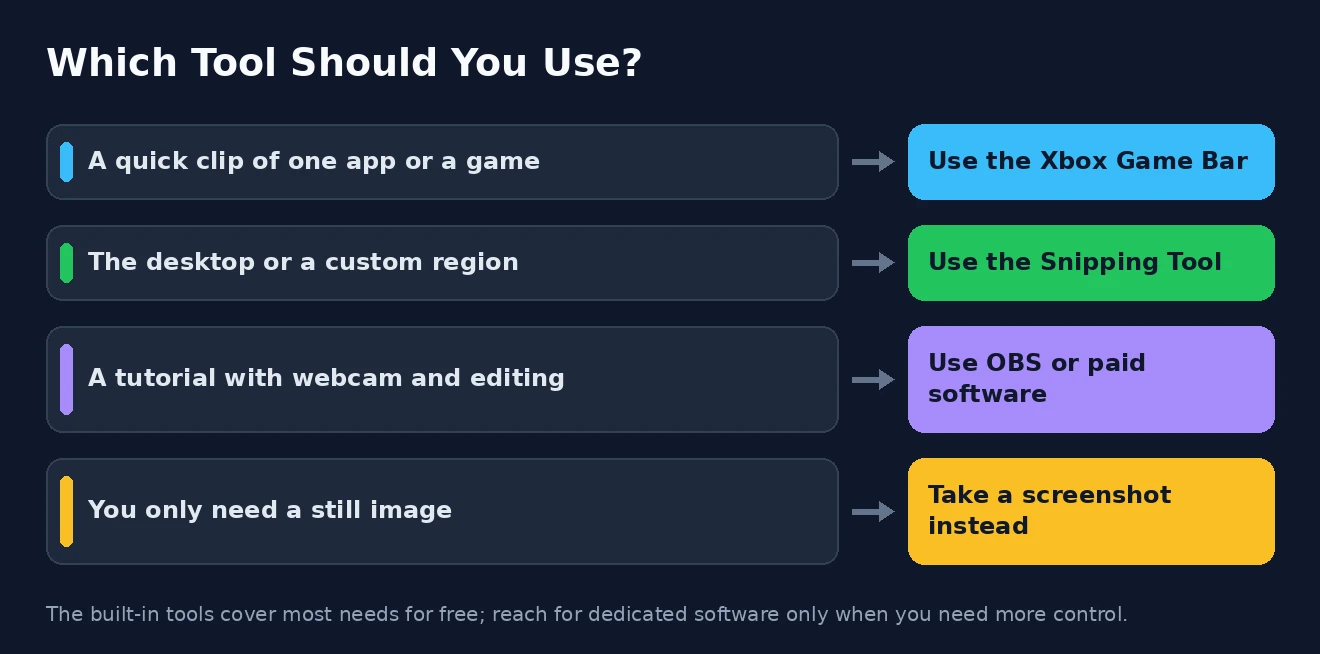
Before diving into steps, it helps to know your two built-in options, because choosing the right one first saves a lot of frustration. Windows 11 lets you record your screen using either the Xbox Game Bar or the Snipping Tool, and each has a clear strength. Neither requires any download — both are already sitting on your PC.
The Xbox Game Bar is the older and more feature-rich of the two. Despite the gaming name, it records any single app or game window along with audio, making it ideal for capturing software demos and gameplay. Its one notable limitation is that it cannot record the Windows desktop or File Explorer — it is built to capture a specific application rather than the whole screen.
The Snipping Tool, which most people know for screenshots, gained a screen recording feature in Windows 11 and fills exactly that gap. It lets you draw a box around any part of the screen — including the desktop — and record just that region. It is the simpler, more flexible option for general recording, and recent updates have added audio capture too. Knowing which tool fits your task is half the battle, so keep that distinction in mind as we go.
Both tools are maintained and updated by Microsoft as part of Windows itself, which is why their features have grown over time — the Snipping Tool’s recording ability, for instance, arrived in a later Windows 11 update rather than being there from the start. That also means they are kept current automatically, and the Microsoft website has resources you may find useful if you want the official documentation for either one. For most users, these two cover everything they will ever need.
How to Record Your Screen with the Xbox Game Bar
The Game Bar is the fastest way to capture an app or game, and once you know the shortcuts it takes seconds. Make sure the window you want to record is open and active, then follow these steps.
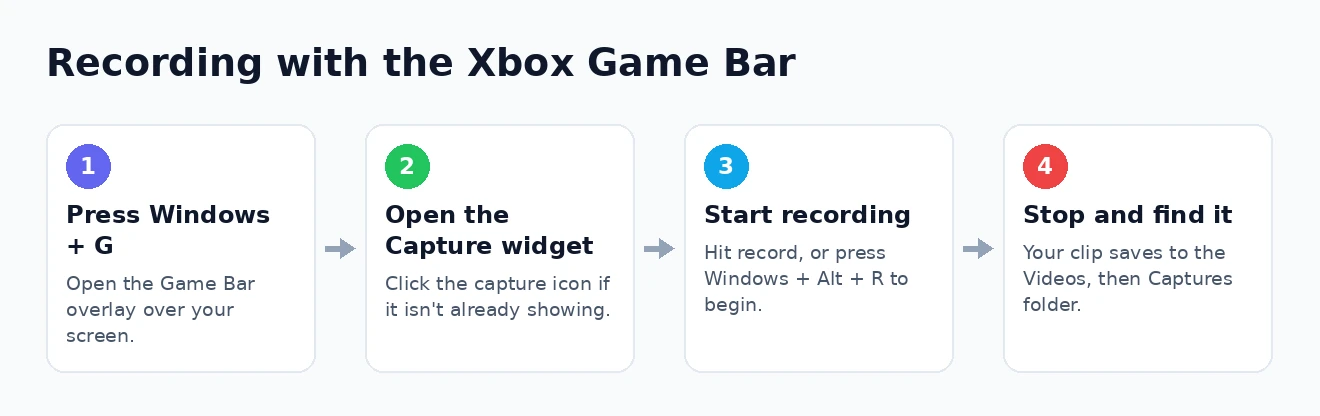
- Press Windows key + G to open the Game Bar overlay across your screen.
- Find the Capture widget. If it is not visible, click the capture icon (a webcam symbol) in the toolbar at the top.
- Click the record button to begin, or simply press Windows key + Alt + R to start recording straight away without opening the overlay.
- To include your voice, toggle the microphone on with the mic button or press Windows key + Alt + M.
- When you are finished, click the stop button on the small floating bar, or press Windows key + Alt + R again to end the recording.
- Find your video in the Videos folder, inside a subfolder called Captures, ready to watch or share.
That is all there is to it, and after a couple of goes the keyboard shortcuts make it almost instant. Remember the key limitation: if you try to record the desktop or a File Explorer window, the Game Bar will not cooperate, because it only captures actual applications. For anything that is not a single app window, the Snipping Tool is the tool you want instead.
The Game Bar has one more trick worth knowing: it can save what just happened even if you were not actively recording. If you enable background recording in its settings, pressing Windows key + Alt + G captures the previous thirty seconds — invaluable for grabbing something unexpected, such as an error message or a fleeting moment in a game, that you did not think to record in advance.
How to Record Your Screen with the Snipping Tool
When you need to record the desktop, a specific region, or several windows at once, the Snipping Tool steps in. It is refreshingly straightforward, and because it records only the area you choose, it keeps file sizes sensible. Here is how to use it.
- Open the Snipping Tool from the Start menu, or press Windows key + Shift + S and open the full app.
- Switch from the screenshot mode to the record mode by clicking the video camera icon at the top of the window.
- Click New to start a new recording.
- Drag to draw a box around the exact area of the screen you want to capture — this can be anything, including the desktop.
- Click Start, and after a short countdown your recording begins; on recent versions you can toggle system audio and your microphone here too.
- Click the stop button when done, then preview your clip and click Save to keep it wherever you like.
The Snipping Tool’s great advantage is flexibility: it records whatever you can draw a box around, with none of the Game Bar’s app-only restriction. If your version is fully up to date, it now handles audio as well, which for a long time was the one thing it lacked. For a quick recording of anything on screen, it is often the easiest choice of the two.
Recording Audio Along With Your Screen
For most recordings, sound is half the point — a silent tutorial is far less useful than a narrated one — so it is worth getting the audio right. Both built-in tools can capture the sound coming from your PC as well as your voice through a microphone, though the controls differ slightly between them.
In the Game Bar, the audio settings live in the Capture widget, where you can switch your microphone on or off before or even during a recording, and adjust the balance between system sound and your voice. The Snipping Tool, on its recent versions, offers a similar choice of capturing system audio, your microphone, or both when you start a recording. In either case, a quick test clip is the best way to confirm everything sounds right before you record something important.
One common snag is ending up with a silent recording. If your finished clip has no sound, it is almost always because the microphone or system audio was toggled off before you began, so it is worth a quick glance at those controls each time. Playing back a short test clip before recording anything important catches the problem instantly and spares you from repeating a long session.
If your narration sounds thin or picks up background hiss, the fix is usually in your microphone rather than the recorder. Speaking closer to a decent mic, recording in a quiet room, and checking your input levels in Windows sound settings all make a noticeable difference. Many of the same principles that keep video quality high apply to audio too — clean input at the source beats trying to repair it afterwards.
When to Use Dedicated Screen Recording Software
The built-in tools are excellent for quick, straightforward recordings, but they do have limits, and knowing where those limits lie tells you when to reach for something more capable. If you find yourself wanting features the Game Bar and Snipping Tool simply do not offer, it is time to consider dedicated software.
The signs you have outgrown the built-in options are fairly clear: you want to overlay your webcam onto the recording, mix several sources, edit as you go, record for a long stretch, or stream live. Built-in tools also offer little control over quality settings and no real editing. Dedicated applications handle all of this, and you do not necessarily have to pay — the free, open-source OBS Studio is enormously popular for exactly these tasks, and the OBS Project website has resources you may find useful for getting started.
There is a whole spectrum of these tools, from free and open-source to polished paid packages, and the right one depends on how serious your needs are. Our roundup of the best screen recording software walks through the leading options for Windows, and if you work on a Mac as well, the best screen recorders for Mac covers the equivalent choices there. For most people, though, the built-in tools remain the sensible starting point.
Editing and Sharing Your Recording
Once you have your recording, a little tidying up often makes it far more presentable, and Windows again gives you what you need without extra downloads. At the very least, you will usually want to trim off the fumbling at the start and end where you were reaching for the stop button.
Windows 11 includes Clipchamp, a capable video editor, alongside the Photos app which handles simple trimming, so basic edits like cutting, joining clips, and adding text are all possible out of the box. For anything more ambitious — transitions, overlays, a proper edit — a dedicated video editor is worth the effort, and our guides to the best video editing software for beginners and video editing software for YouTube point you to friendly options.
Before sharing, spare a thought for file size, because raw screen recordings can be surprisingly large and awkward to email or upload. Compressing the finished video keeps the quality high while making it far easier to send, and our guide to compressing a video without losing quality walks through how. With the recording trimmed and compressed, it is ready to upload, share, or store however you need.
Tips for a Better Screen Recording
A few small habits separate a scrappy screen recording from a clean, professional one, and none of them takes any real effort. A moment of preparation before you hit record pays off in a result you will not be embarrassed to share.
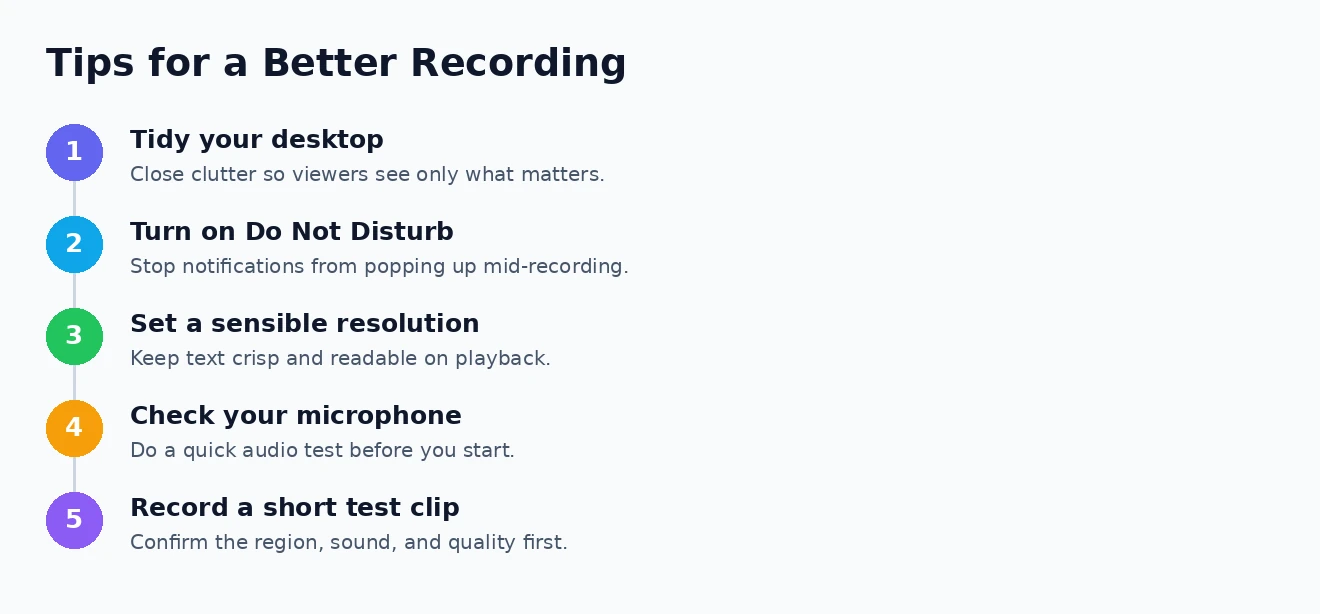
- Tidy your desktop and close clutter. Shut unnecessary windows and tabs so the viewer sees only what matters, and hide personal files from view.
- Turn on Do Not Disturb. Enabling Focus or Do Not Disturb stops notifications from popping up mid-recording, which is the single most common way recordings are spoiled.
- Check your resolution. Record at a sensible screen resolution so text stays crisp and legible when others watch it back.
- Plan what you will show. A quick mental run-through, or a few notes, keeps the recording focused and saves you re-recording.
- Do a short test. A ten-second test clip confirms your audio, region, and quality are right before you commit to the real thing.
Adopt even a couple of these and your recordings improve immediately. The one worth singling out is silencing notifications, because nothing undermines a polished tutorial quite like a personal message sliding into view halfway through. With the distractions handled and a moment’s planning done, recording your screen on Windows becomes something you can do quickly and well.
How to Record Your Screen on Windows: Frequently Asked Questions
Does Windows 11 have a built-in screen recorder?
Yes, two of them. The Xbox Game Bar records a single app or game with audio, and the Snipping Tool records any region of the screen, including the desktop. Both are already installed on Windows 11, so you can record your screen without downloading anything.
How do I record my screen with sound?
Both built-in tools can capture audio. In the Game Bar, turn on the microphone in the Capture widget and it will record system sound and your voice. In an up-to-date Snipping Tool, you can choose to capture system audio, your microphone, or both when you start recording.
Can I record the desktop with the Xbox Game Bar?
No — the Game Bar only records actual application windows, not the desktop or File Explorer. If you need to record the desktop or a custom region of the screen, use the Snipping Tool instead, which has no such restriction.
What is the best free screen recorder for Windows?
For quick recordings, the built-in Game Bar and Snipping Tool are excellent and completely free. If you need advanced features like webcam overlays, multiple sources, or live streaming, the free and open-source OBS Studio is the most popular choice.
That is everything you need to record your screen on Windows with confidence. Reach for the Xbox Game Bar to capture a single app, the Snipping Tool for the desktop or a specific region, and dedicated software only when you genuinely need more power — then trim, compress, and share. With two capable recorders built right into Windows 11, capturing whatever is on your screen is only a keyboard shortcut away.