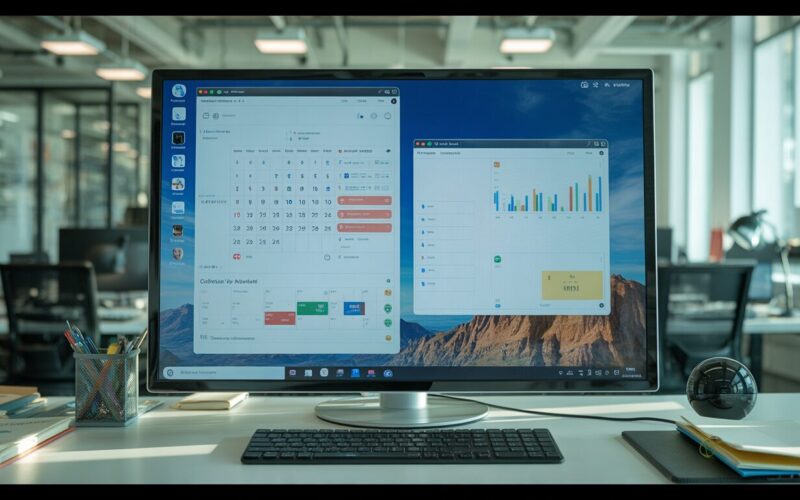
Virtual desktops solve a specific problem: too much happening in one workspace. When you have work documents, a research browser session, a media player, and communication apps all fighting for the same screen real estate, everything feels chaotic. Virtual desktops let you put each context into its own space — switch to Work and you see work stuff; switch to Personal and you see personal stuff. Same screen, same machine, organised by context rather than forced to coexist. For the bigger picture, our Windows 11 How-To Guides pulls everything together.
The underlying concept isn’t new — macOS Spaces, Linux workspace switchers, and older Windows PowerToys solutions have done this for years. Windows 11 built it in natively, and it’s genuinely well-implemented once you know the keyboard shortcuts.
Creating and switching desktops — the keyboard-first approach
The entire virtual desktop workflow is faster with keyboard shortcuts than with the mouse, and those shortcuts are worth learning before anything else:
- Win+Ctrl+D: create a new virtual desktop
- Win+Ctrl+→ / Win+Ctrl+←: switch between desktops left and right
- Win+Ctrl+F4: close the current desktop
- Win+Tab: Task View — shows all desktops and all windows, allowing visual switching and moving windows between desktops
Task View (Win+Tab or the Task View button in the taskbar, if enabled) shows a thumbnail of each desktop at the top of the screen. Hovering over a desktop thumbnail shows its windows; clicking one switches to it. Right-clicking a desktop thumbnail gives options to rename, move, or close it.
Moving windows between desktops
After creating multiple desktops: right-click any window’s taskbar button → “Move to” → choose the destination desktop. Or in Task View (Win+Tab): drag a window thumbnail from one desktop to another. The window moves without closing or losing its state.
You can also send a window to a different desktop without switching to that desktop: right-click the taskbar button → “Move to” → select the target desktop. This is useful for tidying up — moving windows that drifted into the wrong workspace without disrupting your current flow.
Renaming desktops — more useful than it sounds
Task View → hover over a desktop thumbnail → click the name field that appears → type a new name. This matters more than it seems because Win+Ctrl+→ and ← switch between numbered unnamed desktops without much feedback. With named desktops (“Work,” “Research,” “Personal,” “Media”) you can see at a glance which one you’re on from the taskbar. The taskbar at the bottom of the screen shows the current desktop name in some configurations.
Per-desktop wallpaper
Each virtual desktop can have a different wallpaper, which provides an additional visual cue about which context you’re in. Task View → right-click a desktop → “Choose background” → set a distinct image for that desktop. When you switch desktops, the wallpaper changes — a quick visual confirmation that the switch happened and a reminder of what each desktop is for.
Taskbar behaviour across desktops
By default, the Windows 11 taskbar shows all open windows from all desktops. If you prefer the taskbar to only show windows from the current desktop: Settings → Personalisation → Taskbar → Taskbar behaviours → “Show my taskbar on all displays” (this setting also affects multi-monitor) → also look for the desktop-specific option in the same section.
For desktop-specific taskbar filtering: Settings → System → Multitasking → Virtual desktops → “On the taskbar, show all the windows that are open” → change to “Only on the desktop I’m using.” This makes each desktop feel more truly separate — the taskbar only shows what’s relevant to the current context.
Practical workflow examples
Virtual desktops work best for clearly-bounded contexts. A few setups that work well in practice:
- Work / Personal: the simplest setup. Everything work-related on Desktop 1; personal browsing and apps on Desktop 2. Win+Ctrl+→ to switch when needed. Context-switching becomes a keyboard shortcut rather than a mental effort.
- Project-based: a desktop per active project. Each has the relevant documents, browser tabs, and tools for that project open. Useful for consultants and developers working on multiple clients simultaneously.
- Role-based: Email and calendar on one desktop, development environment on another, documentation and reference material on a third. Switch based on what you’re doing rather than hunting through an overcrowded taskbar.
- Focus + Reference: one desktop for active work with only the immediate tools open; one desktop for all the reference material (documentation, guides, examples) you need but don’t want cluttering the workspace.
Virtual desktops vs Snap Layouts — different tools
Snap Layouts (Win+Z or dragging a window to the edge of the screen) organises multiple windows on the same desktop in a tiled layout. Virtual desktops organise different contexts across multiple desktops. They serve different purposes and work well together: Snap Layouts for arranging windows you need to see simultaneously; virtual desktops for separating contexts you switch between.
A practical combination: Desktop 1 has a Snapped layout of document + browser reference. Desktop 2 has email and calendar tiled side by side. Switching between them with Win+Ctrl+→ and ← is much less disruptive than minimising and maximising individual windows.
Our guide on Windows 11 Snap Layouts covers the window tiling system that complements virtual desktops, and our Task Manager guide covers how to identify which processes are consuming resources across desktops. For keyboard shortcut reference and virtual desktop settings documentation, Microsoft’s Windows 11 productivity documentation covers the full Task View and virtual desktop feature set.
What doesn’t work across virtual desktops
A few limitations worth knowing:
- Some applications don’t respect virtual desktops — notification areas, system tray applications, and some Windows components appear on all desktops regardless of where you set them.
- The Win+D shortcut (show desktop) shows the current virtual desktop, not a “super-clean” desktop across all of them.
- Search (Win+S) and the Start menu appear across all virtual desktops — they’re not desktop-specific.
- Closing all windows on a desktop doesn’t automatically close the desktop itself — empty desktops persist until you close them with Win+Ctrl+F4.
Virtual desktops and multiple monitors
On multi-monitor setups: virtual desktops extend across all monitors simultaneously. Switching desktops shows a new context on all screens at once. This is useful but also means a virtual desktop switch changes everything you see, across all monitors — unlike some multi-monitor setups where each screen can be independently configured.
If you want independent monitor-level workspace switching: PowerToys (Microsoft’s free utility collection) includes additional window management tools that complement Windows 11’s built-in virtual desktops. FancyZones provides snap zone templates; other tools add monitor-specific workspace switching that the built-in feature doesn’t support.
| Shortcut | Action |
| Win+Ctrl+D | Create new desktop |
| Win+Ctrl+→ | Switch to next desktop |
| Win+Ctrl+← | Switch to previous desktop |
| Win+Ctrl+F4 | Close current desktop |
| Win+Tab | Open Task View (visual overview) |
| Win+Ctrl+[1-9] | Jump to specific desktop by number |
The Win+Ctrl+[number] shortcuts in the table above are particularly useful once you have a consistent desktop setup — Win+Ctrl+1 always goes to the Work desktop, Win+Ctrl+2 always goes to Research, etc. This makes switching instant and precise without needing to cycle through intermediate desktops.
Virtual desktops in Windows 11 are one of those features that reward a small initial investment in setup and shortcut learning with consistent daily benefit. The people who get the most from them tend to set up a named, predictable desktop structure that matches their actual workflow — not more desktops than they have actual contexts, and a keyboard shortcut workflow rather than a mouse-heavy one. Five minutes to set up the structure and learn the three or four core shortcuts is all it takes to make it a genuinely productive habit.
Third-party tools that extend virtual desktops
PowerToys (downloadable from Microsoft’s GitHub or the Microsoft Store) includes several tools that complement Windows 11’s virtual desktops. Workspaces (added in recent PowerToys versions) allows saving and restoring complete sets of windows — including their arrangement and sizes — that can be launched together. This goes beyond virtual desktops, which just organise windows, to actually launching and positioning them.
For power users who want more control over virtual desktop behaviour than Windows 11 provides natively: VirtualDesktopManager (an older but functional utility) and SylphyHorn add features like per-monitor desktops, more keyboard shortcut customisation, and visual desktop labels in the system tray. These are third-party tools with their own update cycles, but for users who find the built-in virtual desktop feature close-but-not-quite for their workflow: they’re worth investigating.
Gaming with virtual desktops
Virtual desktops work with games but with some caveats. Fullscreen games don’t respond well to desktop switching — Win+Ctrl+→ while a fullscreen game is running may minimise the game, which can cause issues with anti-cheat software or multiplayer lobby connections. Windowed or borderless-windowed mode games handle desktop switching better.
A useful setup for gaming sessions: put the game on one desktop, and any background applications (Discord, a browser for guides, video) on another. Win+Ctrl+→ to check something → Win+Ctrl+← to return to the game. In borderless-windowed mode, this transition is seamless. If the game runs fullscreen: Alt+Tab is usually safer than virtual desktop switching for game-specific applications.
When virtual desktops aren’t the right solution
Virtual desktops work best when you have genuinely distinct contexts to separate. They’re less useful when:
- You frequently need to reference windows from different contexts simultaneously (seeing the document while looking at the email requires windows on the same desktop)
- Your workflow is inherently linear (one task at a time, no parallel contexts)
- You primarily use applications in fullscreen mode (which don’t benefit from the context organisation)
- The overhead of managing desktops creates more friction than it removes
Virtual desktops are a tool, not a productivity ideology. If you try them for a week and find yourself forgetting they exist: that’s a signal that your workflow doesn’t benefit from context separation in this way. The Win+Ctrl+D shortcut to create and Win+Ctrl+F4 to close make it easy to experiment and abandon if it doesn’t fit. There’s no harm in creating a few desktops, using them for a week, and deleting all but one if they’re not improving the workflow — the original desktop and all its windows are unaffected.
For the users for whom virtual desktops do work: they become as fundamental to the workflow as Alt+Tab itself. Context switching with a keyboard shortcut rather than hunting through a crowded taskbar reduces cognitive overhead in a way that’s hard to quantify but easy to feel. Once the habit is established, working without them on a machine that doesn’t have the feature feels notably more cluttered.
Desktop persistence and session handling
Virtual desktops in Windows 11 persist through the session but not through sign-out or restart by default. When you log out or restart: all virtual desktops except Desktop 1 are closed, and all windows that were on those desktops are consolidated onto Desktop 1. The next login starts with a single desktop and your windows in whatever state they were in when you logged out.
This “doesn’t survive restart” behaviour is different from macOS Spaces, which does remember desktop configurations across reboots. For Windows 11: if you have a specific desktop layout you return to every day, recreating it manually is the current approach. PowerToys’ Workspaces feature partially addresses this by allowing saved and re-launched window sets, but not full virtual desktop state restoration.
For heavy users who want persistence: third-party tools or scripts that recreate the desktop structure at login are available but add maintenance overhead. Most users find that the few seconds to create desktops at the start of a session is acceptable given the other benefits during the session. The workflow is: boot, create desktops (Win+Ctrl+D a few times), name them (quick Task View rename), and start working. Within a week, this becomes automatic rather than effortful.
Virtual desktops are one of the features that Windows 11 inherited from Windows 10 and improved incrementally — better keyboard shortcuts, easier renaming, per-desktop wallpapers. They’re not perfect (no session persistence, no per-monitor independence) but they’re genuinely useful for the context separation they do provide. Given that they’re built-in, require no downloads, and are controlled entirely by keyboard shortcuts you can learn in ten minutes: they’re worth trying even if you’ve tried similar features before and found them cumbersome. The Windows 11 implementation is better than earlier versions, and the keyboard-first design makes the everyday workflow smoother than it was. Our guide on Windows 11 Sticky Notes covers an adjacent issue.