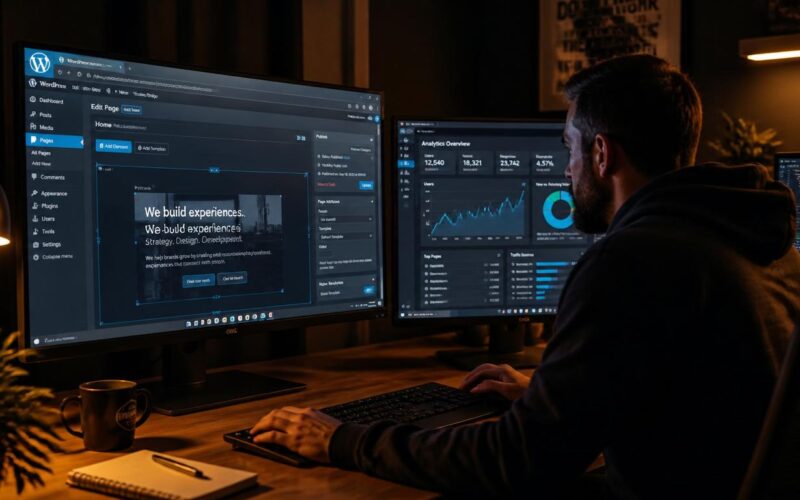
A WordPress staging site is a complete, functional copy of your live website that runs in isolation from real visitors. It is the environment where you test plugin updates before applying them to production, build new features before they go live, try theme changes before committing to them, and debug problems without disrupting anyone. Every WordPress site that is used for real business purposes — meaning any site where downtime, broken checkout flows, or broken forms have tangible consequences — should have a WordPress staging site. I have set up staging environments on sites ranging from small portfolio sites to high-traffic WooCommerce stores, and the setup time is always shorter than the first production incident it would have prevented. This guide covers every method for creating a WordPress staging site: the one-click hosting dashboard approach for managed hosts, the plugin approach for any hosting environment, and the considerations that determine which method fits your situation best. For the bigger picture, our Complete Guide to WordPress How pulls everything together.
What a WordPress Staging Site Is and Why Every Serious Site Needs One
A WordPress staging site is typically accessed via a subdomain — something like staging.yoursite.com or dev.yoursite.com — and runs a complete copy of the live site’s database, files, themes, and plugins. Changes made to the WordPress staging site do not affect the live site at all; they exist in complete isolation until you deliberately push them to production. The staging environment receives no organic traffic, does not appear in search engine results (when configured correctly), and can be broken, reset, and broken again without any consequence to real visitors.
The practical benefits of a WordPress staging site go beyond the obvious “test updates before applying them” use case. A staging environment is where you can install and evaluate a new plugin without affecting site performance for visitors. It is where you can redesign a landing page and share it with a client for approval before the redesign goes live. It is where you can debug a conflict between two plugins by testing different version combinations without causing user-visible errors during the investigation. And it is the environment where a developer can work on the site without needing to coordinate around production updates or risking interfering with visitor sessions.
Many site owners operate without a WordPress staging site for years, and for many of those years everything is fine — until the one plugin update that breaks the checkout process during a sale, or the theme change that breaks the mobile layout and is not noticed for two days. The WordPress staging site is not a tool for sites that are currently having problems. It is insurance and workflow infrastructure for sites that need to stay reliably available as they grow and change.
Create a WordPress Staging Site With Your Host’s Built-in Tool
Managed WordPress hosting platforms — Kinsta, WP Engine, SiteGround, Cloudways, Flywheel — include one-click staging environment creation as a standard feature, and this is the fastest and most seamlessly integrated way to set up a WordPress staging site if your host provides it. The hosting dashboard creates a complete clone of the production environment at a staging subdomain, with automated synchronisation in both directions and a clean push-to-production workflow when you are ready to deploy changes from staging to live.
- Log in to your hosting provider’s dashboard — Kinsta’s MyKinsta, WP Engine’s User Portal, SiteGround’s Site Tools, or whichever panel your host uses
- Navigate to the site management section and look for Staging, Environments, or WordPress Staging — the exact label varies by host
- Click Create Staging Environment or equivalent. The host clones the entire site — files and database — to a staging subdomain. This typically takes 2–5 minutes depending on site size
- Once the WordPress staging site is created, the dashboard provides the staging URL and separate login credentials for the staging WordPress admin. Confirm these are different from production credentials to avoid confusion
- Verify the WordPress staging site is correctly configured to be excluded from search engine indexing — check Settings → Reading in the staging WordPress admin and confirm “Discourage search engines from indexing this site” is checked, or verify your host handles this automatically
- Test the staging site by loading it in a browser and logging in to the staging admin — confirm it is a fully functional copy of the production site
- Note how your host handles database synchronisation. Most hosts allow one-click push from staging to production and from production to staging, but check whether they pull the full database (overwriting staging changes) or offer selective synchronisation
The hosting-provided WordPress staging site is superior to the plugin approach in one important way: the push-to-production workflow. When you have tested your changes on the hosting-provided staging environment and are ready to deploy, the host’s dashboard typically offers a “Push to Live” or “Deploy to Production” function that transfers only the changed files and database rows — not a full overwrite of production. This is significantly safer than the manual approach of applying all staging changes individually to production.
Create a WordPress Staging Site With the WP Staging Plugin
For sites on shared hosting, VPS environments, or any host that does not provide a built-in staging tool, the WP Staging plugin creates a fully functional WordPress staging site directly from within WordPress without requiring SSH access or server-level configuration. It is the most practical approach for sites where the hosting environment does not include staging as a feature.
- Install WP Staging from the WordPress Plugin Directory — search “WP Staging” and install the free version, which covers single-site staging needs
- Navigate to WP Staging → Start in the WordPress admin
- Click Create New Staging Site. WP Staging scans the site and presents a configuration screen
- Choose a subdirectory name for the WordPress staging site — it will be accessible at
yoursite.com/staging-name/rather than a subdomain. This is a limitation of the free version but is functional for most testing purposes - Select which database tables and file directories to include in the staging copy. For a full like-for-like WordPress staging site, include all tables and files. For a staging environment focused on testing specific functionality, you may exclude large media libraries to speed up the cloning process
- Click Start Cloning. WP Staging copies the selected database tables and files to the subdirectory. On a typical site with moderate media, this takes 3–15 minutes
- When complete, WP Staging provides a link to the staging site. Click it to load the cloned site — it is a fully independent copy of the live site accessible at the subdirectory URL
- Confirm the staging WordPress admin is accessible by navigating to
yoursite.com/staging-name/wp-admin/and logging in with the same credentials as the live site (WP Staging preserves user accounts in the clone)
The WP Staging free version creates the WordPress staging site but does not include an automated push-to-production function for the free tier — changes made in staging need to be applied manually to production. The Pro version adds push-to-live functionality, scheduled staging updates, and multisite support. For sites where the manual application of staging changes to production is manageable — applying one plugin update tested in staging is straightforward — the free version is sufficient. For sites with frequent complex changes, the Pro version’s push-to-live workflow is worth the cost.
Managing Your WordPress Staging Site Effectively
Creating a WordPress staging site is only half the work — managing it well over time requires a few operational habits that keep staging useful rather than becoming a liability. A staging site that diverges significantly from production — because production has received updates and content changes while staging is months behind — is no longer a reliable testing environment. Changes tested on a six-month-old staging copy may behave differently on the current production environment.
Refresh the WordPress staging site from production before every major testing session. On managed hosts with a pull-from-production function, this is one click. With WP Staging, this means running the cloning process again to overwrite the existing staging copy with a fresh clone of current production. This ensures that when you test a plugin update on staging, you are testing it against the same WordPress version, plugin combination, and database content as production — not against a snapshot from months ago.
Avoid using the WordPress staging site for content creation. Staging environments are for testing, not for drafting content that will eventually go to the live site. Content created on staging either needs to be manually recreated on production (duplicating effort) or the entire staging database needs to be pushed to production (potentially overwriting production changes made since staging was last synced). Keep staging strictly as a technical testing environment and use the live site’s admin for content creation.
Pushing Changes From Staging to Live
The final step in the WordPress staging site workflow — deploying tested changes from staging to the live production site — is where the approach differs most significantly between the hosting-provided and plugin-based staging methods.
| What Changed in Staging | How to Deploy to Production | Risk Level |
|---|---|---|
| Plugin updated and tested | Apply the same plugin update on the live site via Dashboard → Updates | Low — tested and confirmed working |
| Theme customisation tested | Apply the same changes to the live theme or child theme via FTP or admin editor | Low — changes are known and scoped |
| New plugin installed and configured | Install plugin on live, replicate the configuration settings manually | Medium — configuration must be accurately replicated |
| WordPress core update tested | Apply the core update to production — the staging test confirms it is safe | Low — confirmed compatible with current plugin set |
| Full site redesign or major restructure | Use host’s push-to-live function (managed host) or WP Staging Pro migration | Medium — requires careful database synchronisation planning |
For the majority of WordPress staging site use cases — testing updates before applying them to production — the deployment step is simply applying the confirmed-safe update to production through the standard WordPress admin update interface. The staging test removes the uncertainty, not the update itself. The more complex deployment scenarios (full redesigns, major database changes) benefit from the automated push-to-live tools that managed hosts provide.
Our guide on how to safely update WordPress covers the full update process that the WordPress staging site is designed to support — treating staging as the testing step within the broader update safety workflow. Our guide on how to backup a WordPress site properly covers the backup strategy that complements a WordPress staging site — staging prevents most problems, backups recover from the ones that get through. The WP Staging documentation covers the full plugin configuration for the plugin-based staging approach, including the Pro migration features and the multisite staging options not covered in this guide. You might also run into WordPress Shortcodes Guide.